Tag Archives: GNU

Static IP with NetworkManager

Couple of days ago I had to configure a static IP on the Orange PI wifi interface. Had to use cli, since it is running as a server and there’s no need for a graphical interface. Below is the bash script I made:

#!/bin/bash

CONN="conn_name" # Enter connection name
SSID="myessid" # Define WIFI SSID
IP="192.168.1.15/24" # Enter IP, example "192.168.0.100/24"
GW="192.168.1.1" # Enter gateway
DNS="1.1.1.1,9.9.9.9" # Define DNS servers

nmcli dev wifi list
echo "Adding wifi ${CONN} to SSID ${SSID}."
nmcli connection add type wifi con-name ${CONN} ifname wlan0 ssid ${SSID}
echo "Configuring ${CONN} IP, GW and DNS."
nmcli connection modify ${CONN} ipv4.method manual ipv4.addresses ${IP} ipv4.gateway ${GW} ipv4.dns ${DNS}
echo "Configuring wifi security."
nmcli connection modify ${CONN} wifi-sec.key-mgmt wpa-psk
read -s -p "Enter wifi password: " PASSWORD
nmcli connection modify ${CONN} wifi-sec.psk  ${PASSWORD}
echo "Bringing up connection ${CONN}."
nmcli connection up ${CONN} 

Here are some resources I used:

Debian Wifi HowTo

Debian NetworkManager

networking with nmcli

OpenDKIM in Debian

Lately I’ve been playing with postfix and ways to validate my mail. That’s how I reached DKIM records. Something like ssh keys (a public and private key) but for mail. Installation in Debian GNU/Linux is pretty simple via apt-get as usual, we need to install opendkim and opendkim-tools.

dpkg -l | grep dkim
ii  libmail-dkim-perl              0.40-1                           all          cryptographically identify the sender of email - perl library
ii  libopendkim9                   2.9.2-2+deb8u1                   amd64        Library for signing and verifying DomainKeys Identified Mail signatures
ii  opendkim                       2.9.2-2+deb8u1                   amd64        Milter implementation of DomainKeys Identified Mail
ii  opendkim-tools                 2.9.2-2+deb8u1                   amd64        Set of command line tools for OpenDKIM

We need to open a port for opendkim (8891 in my case), we need to edit /etc/default/opendkim in order to do this as below.

grep -v "^#" /etc/default/opendkim 
SOCKET="inet:8891@localhost" # listen on loopback on port 8891

Continue reading

GPS on Orange Pi 2G IOT

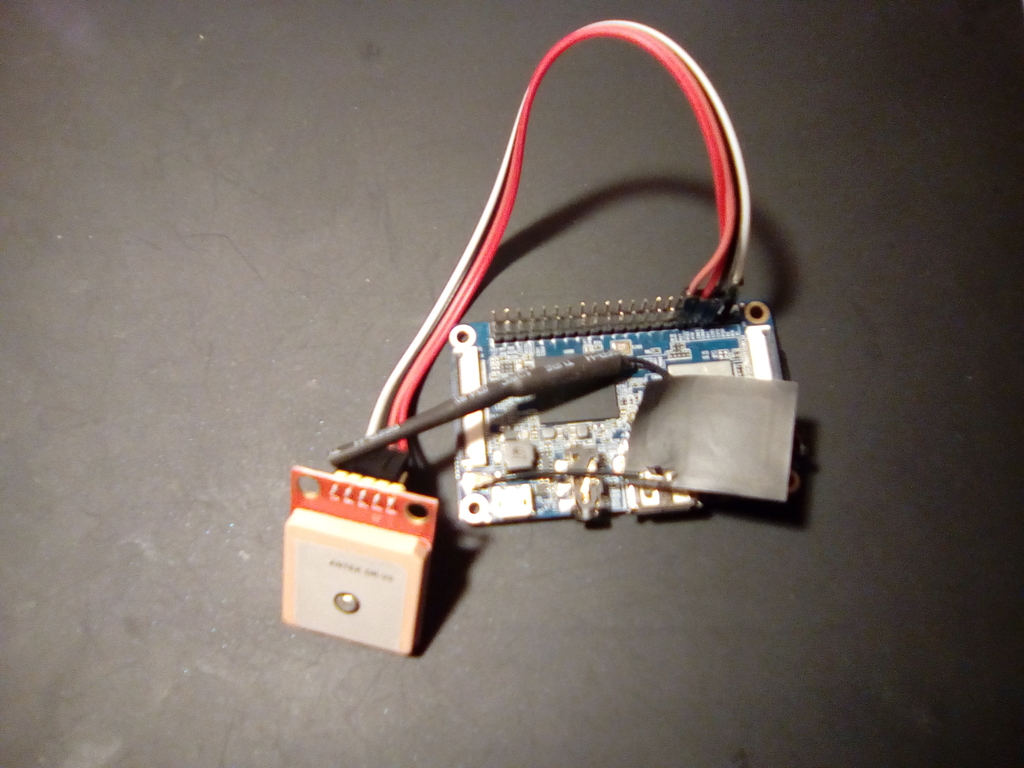
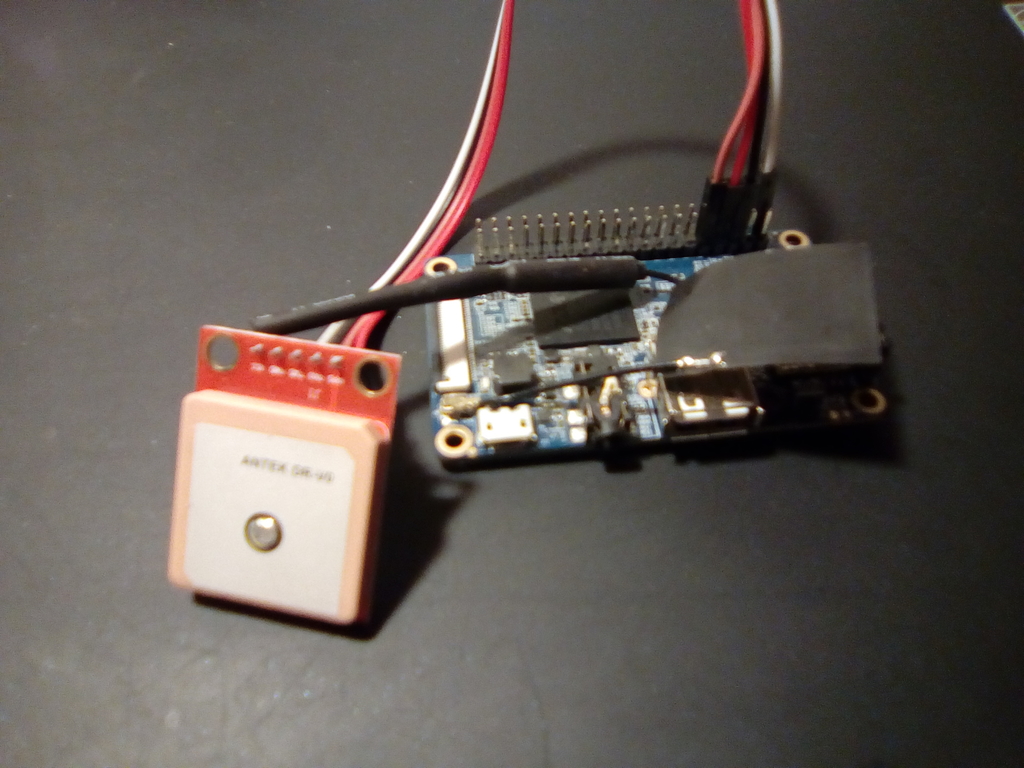
Recently I got myself a GPS module to play with such as this. Not that I knew much about but felt like something nice to play with. First thing first is connecting the GPS module to the GPIO in Orange Pi 2G. In my case I decided to connect the GPS to ttyS2, asides from VCC (2.8V) and GND. This correspond to pins 1, 6, 8 and 10.
Vcc -> pin 1
GND -> pin 6
TxD -> pin 8
RxD -> pin 10

Pin 1 would be the one just below a small white arrow to the left of the SD card. Below two pictures of GPS connected to Orange Pi GPIO pins.


Another important thing is to cross TxD and RxD cables, that means connecting GPS TxD to Orange Pi RxD and GPS RxD to Orange Pi TxD.
Now that the GPS module is connected to the Orange Pi power it up and log into it. We will now check if the GPS mocule is working, in order to do this we will connect via minicom.

minicom -D /dev/ttyS2 -b 9600
Welcome to minicom 2.7

OPTIONS: I18n 
Compiled on Apr 26 2017, 00:45:18.
Port /dev/ttyS2, 19:10:00

Press CTRL-A Z for help on special keys

$GPRMC,191013.00,A,4252.31265,N,7833.00897,W,0.180,,040518,,,A*64
$GPVTG,,T,,M,0.180,N,0.333,K,A*29
$GPGGA,191013.00,4252.31265,N,7833.00897,W,1,06,2.16,296.4,M,51.3,M,,*44
$GPGSA,A,3,22,16,10,08,26,27,,,,,,,3.81,2.16,3.14*04
$GPGSV,3,1,10,01,19,244,,08,60,313,24,10,49,079,28,16,36,164,36*74
$GPGSV,3,2,10,18,42,250,22,20,07,038,,21,06,061,,22,09,195,30*7A
$GPGSV,3,3,10,26,09,158,30,27,69,072,27*70
$GPGLL,4252.31265,N,7833.7897,W,191013.00,A,A*7C

Continue reading

Fixing fail2ban

I had installed fail2ban but had noticed it wasn’t working blocking ssh brute force attacks. Attacks such as below.

grep sshd /var/log/auth.log | tail
Apr 29 08:06:17 sd-229337 sshd[20646]: pam_unix(sshd:auth): check pass; user unknown
Apr 29 08:06:17 sd-229337 sshd[20646]: pam_unix(sshd:auth): authentication failure; logname= uid=0 euid=0 tty=ssh ruser= rhost=211-75-3-35.hinet-ip.hinet.net
Apr 29 08:06:18 sd-229337 sshd[20646]: Failed password for invalid user db2inst from 211.75.3.35 port 52724 ssh2
Apr 29 08:06:19 sd-229337 sshd[20646]: Connection closed by 211.75.3.35 [preauth]
Apr 29 08:18:21 sd-229337 sshd[20711]: pam_unix(sshd:auth): authentication failure; logname= uid=0 euid=0 tty=ssh ruser= rhost=59-120-243-8.hinet-ip.hinet.net  user=root
Apr 29 08:18:25 sd-229337 sshd[20711]: Failed password for root from 59.120.243.8 port 34312 ssh2
Apr 29 08:18:25 sd-229337 sshd[20711]: Connection closed by 59.120.243.8 [preauth]
Apr 29 08:19:14 sd-229337 sshd[20713]: pam_unix(sshd:auth): authentication failure; logname= uid=0 euid=0 tty=ssh ruser= rhost=195-154-136-62.rev.poneytelecom.eu  user=root
Apr 29 08:19:16 sd-229337 sshd[20713]: Failed password for root from 195.154.136.62 port 24329 ssh2
Apr 29 08:19:16 sd-229337 sshd[20713]: Connection closed by 195.154.136.62 [preauth]

In order to fix this we need to modify /etc/fail2ban/filter.d/common.local and modify bsd_syslog_verbose entry. Substitute __bsd_syslog_verbose = (<[^.]+\.[^.]+>) for __bsd_syslog_verbose = (<[^.]+ [^.]+>).

grep bsd_syslog_verbose /etc/fail2ban/filter.d/common.local
#__bsd_syslog_verbose = (<[^.]+\.[^.]+>)
__bsd_syslog_verbose = (<[^.]+ [^.]+>)
__prefix_line = \s*%(__bsd_syslog_verbose)s?\s*(?:%(__hostname)s )?(?:%(__kernel_prefix)s )?(?:@vserver_\S+ )?%(__daemon_combs_re)s?\s%(__daemon_extra_re)s?\s*

Restart fail2ban and you shall now see IPs performing brute force attacks being blocked as below.

tail -30 /var/log/fail2ban.log | grep actions
2018-04-29 18:43:19,835 fail2ban.actions[28271]: WARNING [ssh] Unban 163.172.159.119
2018-04-29 18:43:20,742 fail2ban.actions[28519]: INFO    Set banTime = 1800
2018-04-29 18:43:20,936 fail2ban.actions[28519]: INFO    Set banTime = 600
2018-04-29 18:43:59,119 fail2ban.actions[28519]: WARNING [ssh] Ban 171.244.27.195
2018-04-29 18:46:05,286 fail2ban.actions[28519]: WARNING [ssh] Ban 5.188.10.185
2018-04-29 19:13:59,938 fail2ban.actions[28519]: WARNING [ssh] Unban 171.244.27.195
2018-04-29 19:14:50,026 fail2ban.actions[28519]: WARNING [ssh] Ban 171.244.27.195
2018-04-29 19:15:35,102 fail2ban.actions[28519]: WARNING [ssh] Ban 159.65.10.166
2018-04-29 19:16:06,167 fail2ban.actions[28519]: WARNING [ssh] Unban 5.188.10.185
2018-04-29 19:44:50,740 fail2ban.actions[28519]: WARNING [ssh] Unban 171.244.27.195
2018-04-29 19:45:35,821 fail2ban.actions[28519]: WARNING [ssh] Unban 159.65.10.166
2018-04-29 19:45:38,858 fail2ban.actions[28519]: WARNING [ssh] Ban 171.244.27.195

But why is this happening? It is because of regular expressions. The way logs are being written it will never find a match with the original __bsd_syslog_verbose. Below script test both bsd_syslog_verbose settings. Originally we needed to have a ., but in reality we have a space in our logs, so we need to modify bsd_syslog_verbose.

#!/usr/bin/env python

import re

testline = 'May 13 06:24:36'

match = re.search('[^.]+\.[^.]+', testline)
if match:
    print 'Found:', match.group()
else:
    print 'Not found for bsd_syslog_verbose=[^.]+\.[^.]+'

match = re.search('[^.]+ [^.]+', testline)
if match:
    print 'Found:', match.group()
else:
    print 'Not found for bsd_syslog_verbose=[^.]+ [^.]+'

And we execute:

 python regex.py 
Not found for bsd_syslog_verbose=[^.]+\.[^.]+
Found: May 13 06:24:36

More info here and some instructive regex google doc.

Pepephone 2G on Orange Pi 2G IOT

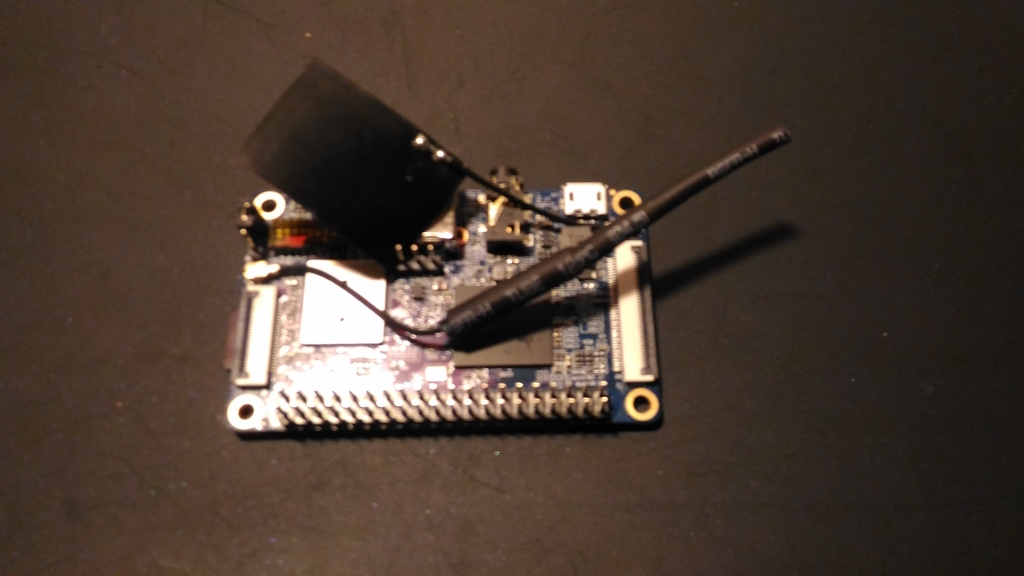
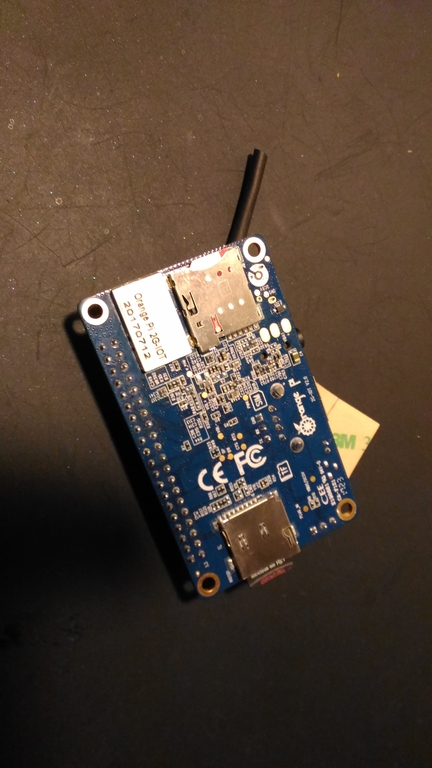
Recently I bought an Orange Pi 2G IOT. Pretty decent for $10 I would say, not a lot or RAM or CPU, but the interesting thing from my point of view is the 2G modem. Some pictures below with SIM card installed.


So the idea of this post is how to configure this device to connect to Pepephone network with a PIN on SIM. After some testing I finally came up with below wvdial.conf which works for me.

[Dialer defaults]
Modem = /dev/modem0
Baud = 30720000
Dial Command = ATDT
Init1 = ATE1
Init2 = AT+CPIN="XXXX"
Init3 = AT+CFUN=1
Init4 = AT+CGATT=1
Init5 = AT+CGDCONT=1,"IP","gprs.pepephone.com","",0,0
FlowControl = CRTSCTS
Phone = *99#
Username = " "
Password = " "
Stupid Mode = 1
Auto Reconnect = on

Pin entry above should be replaced with your SIM pin.
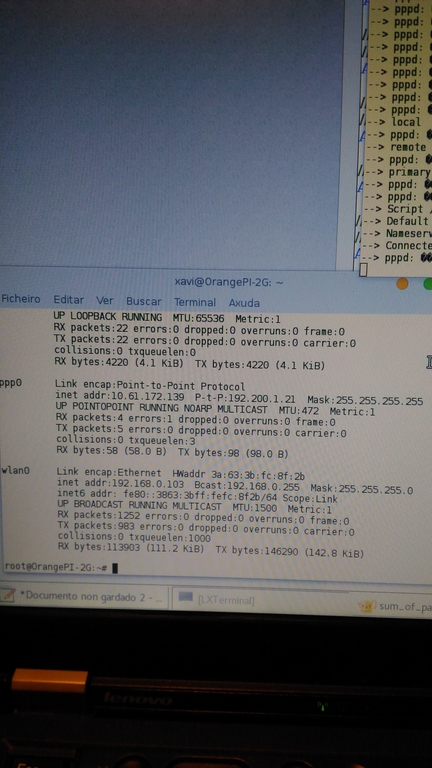
Execute running wvdial from cli and you should be able to see a new interface named ppp0. Below is a screenshot of both interfaces ppp0 and wlan0.More info here (in spanish).